Ledged Oak Doors - Traditional joinery project in North Devon
- Lawrence Feingold

- Jan 25
- 3 min read
Updated: Mar 27

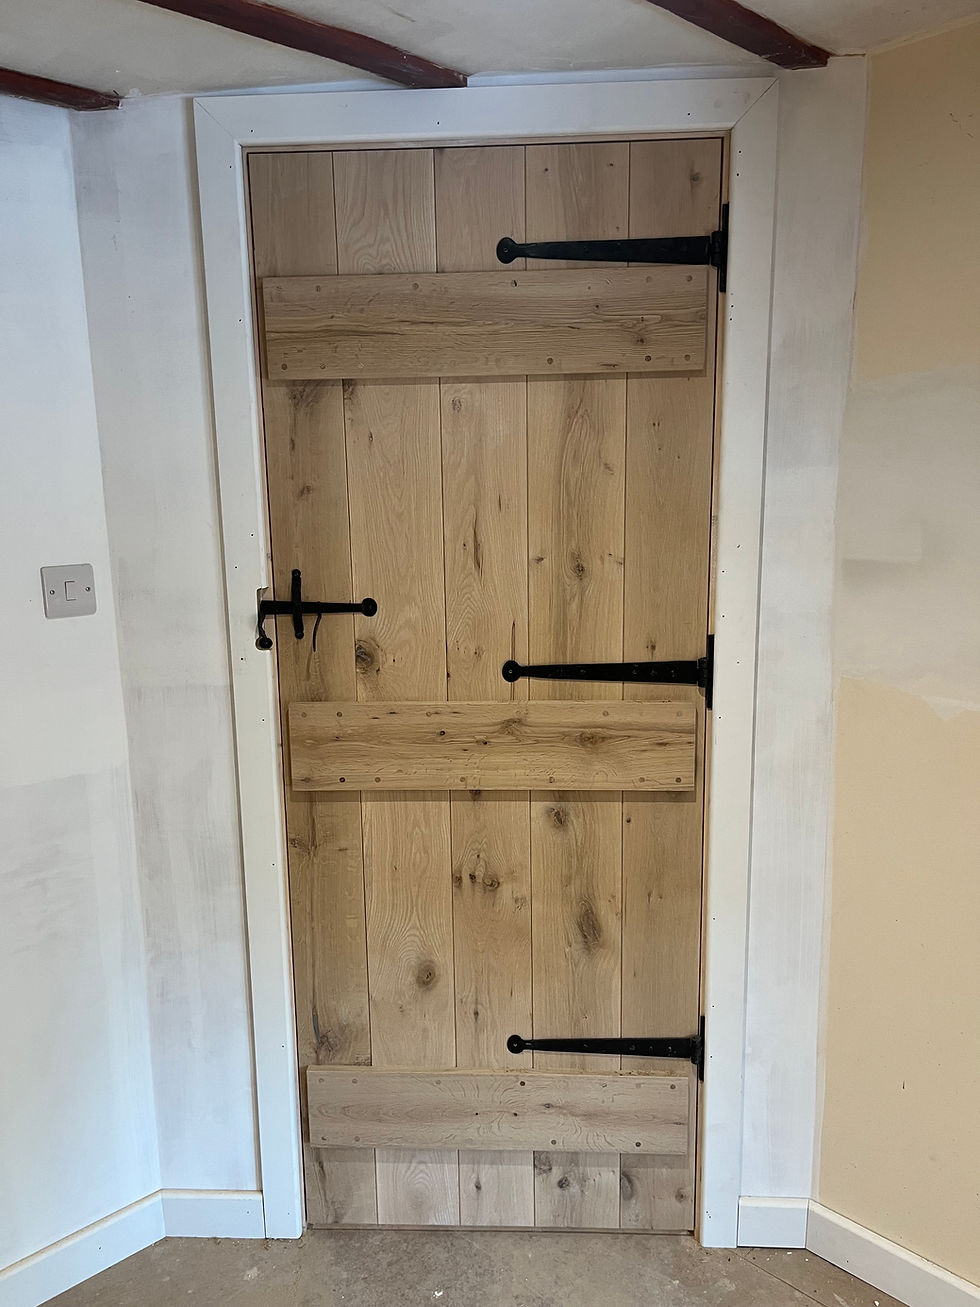
This project was my first time hanging ledged oak doors using traditional T hinges, rather than my usual butt or strap hinges. While I’ve made and fitted ledged doors many times before, using this style of ironmongery introduced a few practical and visual challenges that needed careful thought to achieve a clean, professional finish.
Ledged oak doors are a classic element of traditional joinery, and when paired with surface-mounted hinges they bring a strong, honest character. That said, fitting them into finished openings requires careful detailing if the end result is going to look intentional rather than compromised.
Finishing the Architrave Around T Hinges
One of the first issues was how to deal with the architrave, the trim used to cover the joint between the plaster and the door frame.
In some settings, particularly more rustic or outbuilding-style installations, ledged doors are fitted without architrave, which avoids the issue entirely. In this case, however, architrave was required, and because T hinges sit proud on the face of the frame, it immediately raised a problem: how to achieve a neat visual finish without making future door removal awkward.
My first attempt involved cutting the architrave around the hinge plates. In practice, this resulted in broken lines and an untidy appearance — not something that sits comfortably with good carpentry and joinery standards.

The better solution was to rebate the back of the architrave, allowing it to sit cleanly over the main body of the hinge. This keeps strong, continuous lines around the frame while accommodating the hinge hardware.
The only compromise is that if the door ever needs to come off for trimming or adjustment, the section of architrave running across the door has to be removed first. In real terms, that’s a small price to pay for a far more refined finish.

Traditional Latch Positioning
The next challenge was the traditional latch system. Unlike modern ironmongery, these latches offer no flexibility in fixing positions — they work one way, and that’s it.
For the latch to function correctly:
It must be fixed to the front face of the frame
There must be enough clearance for the latch to lift when opening
The relationship between the latch, handle, door, and frame must be exact
With little room for error, I decided the best approach was to make a routing jig to
guarantee consistency.

I hand-routed a jig that could be planted onto each frame, giving me the exact position for the latch housing every time. Once that position was set, it automatically dictated where the handle landed on the door, resulting in a consistent layout across all the ledged oak doors.

Routing Through the Door
To create the hole through the door, I used a hand router with a 6mm cutter, supported by a fence to keep everything straight and controlled.
As tends to happen, it was the last door that caused a minor issue, with the cutter veering slightly off line. This was repaired using a small oak insert and PVA glue. The repair was largely unsighted and once finished was completely invisible, with the final result working exactly as intended.
Final Thoughts
Projects like this are one of the most enjoyable parts of bespoke carpentry and traditional joinery. Working through unfamiliar details encourages proper problem-solving and gives a clearer understanding of time allowances for similar work in the future.
This installation took longer than expected due to the added detailing and setup, but the benefit is that the solutions are now established. On the next set of ledged oak doors fitted with T hinges, the process will be far more efficient — without any compromise on quality or finish.


Comments